
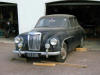

MG Magnette V8
November 2006 loomed with a busy list of tasks for me to complete, with the engine at By'Gone for a freshen up and carbs at Weber Specialties for a freshen up, the BMW power steering rack at Porana Power Steering for a freshen up (overhauled and returned in just 4 days....) and the base shell was almost complete, with most major mechanical bits sourced and located in or on the car. The major tasks on my list for was manufacturing replacement fibreglass panels for the boot lid, bumpers, front wings and bonnet, plus sorting out the dashboard and wiring - none of which I completed.

I had rigged up a temporary structure to help with the wiring but without several key items, progress has been slow. Sourcing a decent kill-switch and getting the wiring for the wiper delay seemed to be taking an age, but I had been busy elsewhere anyway... (End 2006 and still no killswitch...)
On e
success however was working out how to incorporate an indicator lamp
without butchering the original rear lights or adding an afterthought. I cannibalized a trailer lamp
unit and carefully removed a bulb holder, and I could mount that inside the
original MG ZA light fitting. That not only saved adding another unit, but
preserved the original look of the rear end.
e
success however was working out how to incorporate an indicator lamp
without butchering the original rear lights or adding an afterthought. I cannibalized a trailer lamp
unit and carefully removed a bulb holder, and I could mount that inside the
original MG ZA light fitting. That not only saved adding another unit, but
preserved the original look of the rear end.
A DISAPPOINTING DOWNSIDE
The 4 Performance wheels were purchased back in February and when checking for clearances etc., in August, the one we were using was found to be damaged and not running true. So, the other 3 were checked and 3 were found to be damaged!
They were been returned to the importers/manufacturers, but Performance Wheels of Tauranga seemed to be less than keen to replace them. Months after returning them, I had to file a court claim against them. Watch this space. A car without wheels is rather difficult to move so this could now cause major and very costly problems.
BODYSHELL
Farnie was busy (as always) filling in small holes and generally tidying up the floor pan, slightly moving the pedals, trying to sort out handbrake cables and generally getting the interior and underside ready to paint, but before the cage could be painted, Motorsport NZ had to pass the welds - from photographs... which they did Thanks Leon.
Bruce finished the scuttle repairs and that probably completed the major external bodywork with the notable exception of the four doors, and I made the decision to patch those myself as the cost of getting them done professionally was just too much and I am already way over budget...
DECEMBER 2006
WIRING - AGAIN
Graeme Collett managed to send up the correct
wiring plugs for the steering column wiring, after a couple of false starts and fortunately for me,
he also sent the Pektron wiper
control unit from a car he was breaking - which is different from the Lucas
unit I had been supplied with - with different plugs. This meant that soldering in a
new 4
wire
 plug and socket was a piece of cake as the wiring colours matched up to the
steering column wires. However, when transferring my attention to the
connections to the modified
wiper motor, the wiring colour codes and even the number of them didn't match!
According to the wiring diagram (in the Haynes manual) and also the plugs, I had two grey wires that
should be going to the motor, but I had no idea what they connected to!
Oh dear. Back to Graeme Collett again but unfortunately, he had already
sold the wiper motor from the original car and the motor he sent up overnight was
identical to the one I already had... So, I posted a query on the MG Montego Internet site,
and had an immediate response and offer to assist, but the club believes that
there may have been two models of wiper motor... Certainly, the Haynes car
Manual for the Montego has a wiring diagram at odds with what I had on the
motors.
plug and socket was a piece of cake as the wiring colours matched up to the
steering column wires. However, when transferring my attention to the
connections to the modified
wiper motor, the wiring colour codes and even the number of them didn't match!
According to the wiring diagram (in the Haynes manual) and also the plugs, I had two grey wires that
should be going to the motor, but I had no idea what they connected to!
Oh dear. Back to Graeme Collett again but unfortunately, he had already
sold the wiper motor from the original car and the motor he sent up overnight was
identical to the one I already had... So, I posted a query on the MG Montego Internet site,
and had an immediate response and offer to assist, but the club believes that
there may have been two models of wiper motor... Certainly, the Haynes car
Manual for the Montego has a wiring diagram at odds with what I had on the
motors.
BODYSHELL
Farnie used his crane/frame to tip the shell onto its side, having
stripped off all
 components and Bruce reappeared to tidy up some of the
underside welds and panels and then I had intended to apply POR 15 Silver paint, as I
had heard good things about it. So through long time friend Ron, who owns
a paint suppliers, I bought a couple of tins of silver and a tin of Blackcote
for some of the brackets and suspension. (phew! Expensive stuff...) This
paint bonds well to slightly
rough and rusty metal, drying to a good shine - which unfortunately doesn't last
when exposed to UV, but with a UV proof top coat, the finished surface is chip proof
and very durable. However, when I arrived down at the workshop, with the
paint, Farnie had already applied a coat of etch primer - which was not
required... (it had to be removed later from the main shell too). Rather than go backwards and remove it, I opted to purchase a couple of litres of two pot silver to go on
the top of the etch primer. The upper body will be painted professionally, and
I was quite happy for
components and Bruce reappeared to tidy up some of the
underside welds and panels and then I had intended to apply POR 15 Silver paint, as I
had heard good things about it. So through long time friend Ron, who owns
a paint suppliers, I bought a couple of tins of silver and a tin of Blackcote
for some of the brackets and suspension. (phew! Expensive stuff...) This
paint bonds well to slightly
rough and rusty metal, drying to a good shine - which unfortunately doesn't last
when exposed to UV, but with a UV proof top coat, the finished surface is chip proof
and very durable. However, when I arrived down at the workshop, with the
paint, Farnie had already applied a coat of etch primer - which was not
required... (it had to be removed later from the main shell too). Rather than go backwards and remove it, I opted to purchase a couple of litres of two pot silver to go on
the top of the etch primer. The upper body will be painted professionally, and
I was quite happy for
 Farnie to paint the underside, but only time will tell if
it is going to be durable enough. I brush painted inside the boot so that
the tank could be permanently fitted plus the fuel pump and filter. I also
painted various brackets and took home the crack tested front suspension
components for painting.
Farnie to paint the underside, but only time will tell if
it is going to be durable enough. I brush painted inside the boot so that
the tank could be permanently fitted plus the fuel pump and filter. I also
painted various brackets and took home the crack tested front suspension
components for painting.
On the last working day before Christmas 2006, the car underside and engine bay had been painted and the car tipped back the right way up and my state of mind was 1000% better than at the same time in 2005. I started to brush paint the front cross member in black, for contrast, and also managed a coat of silver POR15 on the rear axle. (it will be black as red isn't available...) Farnie checked the dif and found it to be in excellent condition.
The rear leaf springs were wire brushed and deemed to be in good order and not requiring dismantling - at this stage. So, a quick, thin spray coat of basic enamel only, then a coat of POR15 Blackcote for durability and initial looks.
2006 SUMMARY
The end of December 2006, and the progress was significant. After the lack of progress in 2005, that was encouraging, especially as most of the mechanical and structural work had been done and a start made on painting and final assembly. Farnie had worked on the car almost every week and as he was then fully self-employed, having previously been working on WW2 army vehicles for a private client. I have no hesitation in recommending him for fabrication work, through his business - ModFab, located now at Warkworth, having moved from Beachaven.
Seeing regular progress being made had been fantastic, though not without some considerable pain to the wallet at times... For anyone else contemplating such a project, it is far too early to offer advice, other than one of the slowest and most expensive parts had been the suspension and brakes.
Sourcing calipers and the purpose manufactured suspension at the front, added a lot of money to the project cost, and only time will tell if it has been worthwhile. (Subsequently, it transpired that this would not be the end of the suspension saga...) Certainly, others had used proprietory parts which are no doubt acceptable.
Having three out of four alloy wheels supplied in a damaged state (leading to a court case against the manufacturers), is something I could have done without, especially as the final overall cost to them may well exceed the actual loss they would have occurred had they just replaced them. But, the NZ Consumer Goods Act is there to protect customers and so that was the only course of action I could take.
I had been slowed with the wiring on two fronts - both on-going. Just getting a kill-switch (rather than a battery isolation switch) had taken 8 weeks - and I still didn't have it...
The other hiccup had been getting the MG Montego steering column wiper controls to connect to the wiper motor, via the programmed delay unit. Once those two items were finalised, the rest of the wiring should have been straightforward. Should have been...
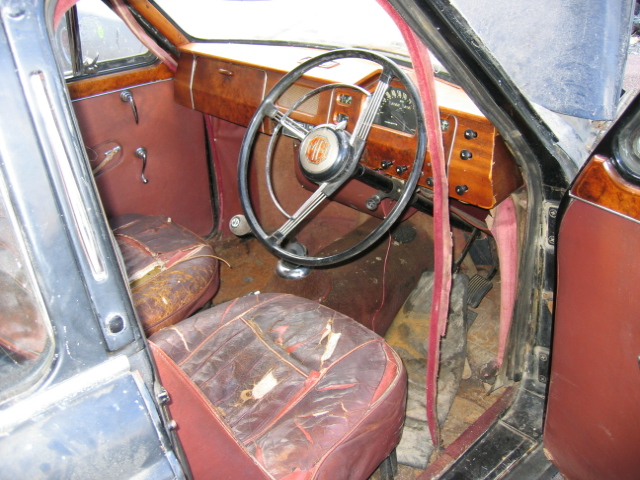
Manufacturing a new dashboard from scratch is another expensive option, with 4 small sheets of burr walnut veneer costing $200NZ... but, I think the car deserved a decent dash in a modernised version of the original, but incorporating additional instruments and switches and also a modern radio/CD player. Modern? Well it was when I started, but then that was pre i-Pod and MP3 players.
Also on my 'to do' list was the manufacture of several panels in fibreglass - sill covers, boot and bonnet lids, front wings and bumpers. (I think that this has been said before and will probably be said again.) All 4 doors needed work too, so I think I was still a long way from completion... I had hoped that the car would be finished 2007 sometime, but I was not setting a target date. I think that would have been very foolish...

Front awaiting blackcote paint on the suspension/subframe - that was my job...

I wonder how long it will stay looking so nice... Not a concours car by any means but there was no reason why it couldn't look good to start with. The pipe or tube shown underneath the car was for the battery cable and the Panhard rod mounting is also visible at the top of the picture.