
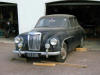

MG Magnette V8 - "MON ZA8"
All four doors had some rot in the bases and most had slight rust holes on the lower sections. Bruce had replaced some metal in the drivers door outer skin, but there was still a lot of work required, though having a bare door does make it easier. The doors are heavy, even without the weight of the windows, winding mechanisms and the door locks. In some respects, getting the doors rebuilt was one of the most daunting tasks remaining, especially as the havoc wreaked on rubbers and trims over 50 years was considerable, and extremely expensive to fix. Just as an example, a UK website lists new front moulded quarter-light rubbers at £100 (NZ$300) - each! Bear in mind the whole car cost me $750... (£250)
MAY 2007
My pile of door bit and pieces was quite extensive, with
various bags of rusty nuts, bolts and screws added to glass, trims, door and
window mechanisms, handles etc. Locating a
 position
for front mounted speakers was an early task, and the speakers had a rather
garish mauve colour that needed toning down, so the speakers were carefully
masked and given a coat of silver. Picture shows the speaker just
held in by a couple of self tappers and before some form of extra support and a
little bit of panel beating on the opening, but without removing any metal.
As part of the general thinking at this time, I decided to try and incorporate
some sort of door pocket, as the original interior is rather lacking in storage
space for oddments. Anyone brought up as I was with early Minis,
appreciates the value of door pockets!
position
for front mounted speakers was an early task, and the speakers had a rather
garish mauve colour that needed toning down, so the speakers were carefully
masked and given a coat of silver. Picture shows the speaker just
held in by a couple of self tappers and before some form of extra support and a
little bit of panel beating on the opening, but without removing any metal.
As part of the general thinking at this time, I decided to try and incorporate
some sort of door pocket, as the original interior is rather lacking in storage
space for oddments. Anyone brought up as I was with early Minis,
appreciates the value of door pockets!
The interior bottom of the door was given a thin covering
 of
fibreglass as a combination of repair and rust-proofing and the drain holes left
operative. Door mechanisms were very grubby and responded well to a scrub
with kerosene/paraffin and a degreaser followed by a water blaster. At
this point, I noticed that the ends were marked "R" and "L" - left and right of
course. Now traditionally, one sits in the car, and the right side of the
car is "R". For some reason, the door mechanisms were to my mind, marked
the opposite way, that is, looking from the front of the car!
of
fibreglass as a combination of repair and rust-proofing and the drain holes left
operative. Door mechanisms were very grubby and responded well to a scrub
with kerosene/paraffin and a degreaser followed by a water blaster. At
this point, I noticed that the ends were marked "R" and "L" - left and right of
course. Now traditionally, one sits in the car, and the right side of the
car is "R". For some reason, the door mechanisms were to my mind, marked
the opposite way, that is, looking from the front of the car! The picture below shows the right hand door and the mechanism quite clearly has
the "L" stamped on it...
The picture below shows the right hand door and the mechanism quite clearly has
the "L" stamped on it...
All 4 door and window mechanisms were cleaned and
lubricated and the metal given a light spray of zinc based paint. A rather
superfluous coat of black enamel followed. Understanding exactly how the
door locking system works was part of the learning process for me and even
stripping the driver's door handle was an education,
 the
lock being retained by a small spring loaded "C" shaped component. The door
handle to lock bar was sleeved with a sewn piece of felt, presumably as and
anti-rattle measure. This will of course be replaced.
the
lock being retained by a small spring loaded "C" shaped component. The door
handle to lock bar was sleeved with a sewn piece of felt, presumably as and
anti-rattle measure. This will of course be replaced.
The front quarter-light construction was fairly
straightforward, but one of the rubber inserts was not in a very good condition
and the above price for a replacement was frightening. The rust had
 attacked the bottom threaded, spring loaded swivels and one snapped and the
other was so badly corroded that the thread was stripped
and the nut had to be cut off. The remaining small components were
sandblasted before zinc coating and a coat of POR15 primer applied to the frame.
The picture shows the better of the two, with just one nut rather than the two
originally. Hopefully, this will be OK. The second frame had to be
reassembled without the spring... Needless to say, all threads were
greased before reassembly...
attacked the bottom threaded, spring loaded swivels and one snapped and the
other was so badly corroded that the thread was stripped
and the nut had to be cut off. The remaining small components were
sandblasted before zinc coating and a coat of POR15 primer applied to the frame.
The picture shows the better of the two, with just one nut rather than the two
originally. Hopefully, this will be OK. The second frame had to be
reassembled without the spring... Needless to say, all threads were
greased before reassembly...
JUNE/JULY 2007
Attention then reverted to the doors themselves - or a t
least, the driver's door. The window mechanism was temporarily refitted
but just about all rubbers and felts needed replacing, but with the mechanisms
and even the window runners in place, it was possible to mark the door to see
what space was available for a pocket.
t
least, the driver's door. The window mechanism was temporarily refitted
but just about all rubbers and felts needed replacing, but with the mechanisms
and even the window runners in place, it was possible to mark the door to see
what space was available for a pocket.
The centre of the door normally has a bracket that acts as
a stop for the windows. The bracket forms a deep triangle and is covered
with thick
 felt. This was replaced by a piece of galvanized steel and bent
to form a "U" rather than a triangle, (just visible above, with a
piece of high density foam behind it) to give more space underneath. The
original door cover is rather boring, being just a flat panel with a rather
cheap looking cord door pull. The addition of a pocket does at least
add a bit of shape and the construction was mainly of plywood, but being careful to
make sure that condensation or water on the inside of the door would flow out
through the drain holes.
felt. This was replaced by a piece of galvanized steel and bent
to form a "U" rather than a triangle, (just visible above, with a
piece of high density foam behind it) to give more space underneath. The
original door cover is rather boring, being just a flat panel with a rather
cheap looking cord door pull. The addition of a pocket does at least
add a bit of shape and the construction was mainly of plywood, but being careful to
make sure that condensation or water on the inside of the door would flow out
through the drain holes.
The ply would be waterproofed anyway.
Needless to say, this was another job that took a fair bit of time but if not
carried out early, probably wouldn't get done at all...
Attention quickly moved to selecting the colour and in
keeping with the exterior colours (black and silver) and the fact that the seats
are already black with a little bit of grey trim, a hunt around a local
furniture repairer and boat squab maker turned up some silver grey vinyl and as
there was only two metres left, it seemed perfect. The door pocket panel
was covered in black vinyl.

Picture shows the outer part of the pocket only.
The inner was constructed out of ply and hardboard and then waterproofed with a
coat of Bitumen paint. maybe it would have been better done with
fibreglass resin. The rest of the door panel was cut out of a sheet of
seconds quality 3ply and the back was covered with 1 layer of 300gsm fibreglass
to act as a water-proof membrane but also to strengthen the panel. The
original cord door pull looked cheap and there
were no arm rests on the front doors.
 Harking back to the Marcos, wood was
selected as the best material for the door pull, and a length dowel, or bannister rail was selected as the ideal material - because I had a length lying
around! This was run through the saw to give a flat rear edge on to which
a 20mm square strip was screwed and glued, to give a finger hold. This was
then mitred to echo the shape of the the door pocket, then
Harking back to the Marcos, wood was
selected as the best material for the door pull, and a length dowel, or bannister rail was selected as the ideal material - because I had a length lying
around! This was run through the saw to give a flat rear edge on to which
a 20mm square strip was screwed and glued, to give a finger hold. This was
then mitred to echo the shape of the the door pocket, then
 covered with a
thin layer of foam before covering in black vinyl. Cutting a pattern
for the vinyl wasn't easy either, as the curves and angles were quite tricky.
The picture above right shows the template shapes necessary to form the angled join, with a
couple of darts to make the covering of the top a little easier but before the
vinyl was sewn. The door panel was attached to the door using 5mm Rivnuts rather than
panel clips but the heads of the bolts needed disguising. As you can see
from the picture, the door pockets are totally obscured by the seat, so all that
work to make it look good was a little wasted on the casual onlooker.
covered with a
thin layer of foam before covering in black vinyl. Cutting a pattern
for the vinyl wasn't easy either, as the curves and angles were quite tricky.
The picture above right shows the template shapes necessary to form the angled join, with a
couple of darts to make the covering of the top a little easier but before the
vinyl was sewn. The door panel was attached to the door using 5mm Rivnuts rather than
panel clips but the heads of the bolts needed disguising. As you can see
from the picture, the door pockets are totally obscured by the seat, so all that
work to make it look good was a little wasted on the casual onlooker.
I took the cut vinyl shapes for the first two arm rests into work and Gaewyn took about two minutes to sew up the fronts for me. If I was doing it again, I'd probably go for leather, but then we'd need a much larger stitch and a heavier needle and thread.
 At the same time as this was going on, the door catches
were unearthed and cleaned up a bit in the sandblaster then lightly buffed.
Well, why not? The next stage was to cut the speaker hole out of the panel
before covering and the next pic shows the re-veneered door capping in position
and the door open to
show the pocket, but before the arm rest had been covered and the speaker hole
cut. Just visible is a strip of red cord piping to seal the gap between
the two panels, echoing the rather nice trim of the
At the same time as this was going on, the door catches
were unearthed and cleaned up a bit in the sandblaster then lightly buffed.
Well, why not? The next stage was to cut the speaker hole out of the panel
before covering and the next pic shows the re-veneered door capping in position
and the door open to
show the pocket, but before the arm rest had been covered and the speaker hole
cut. Just visible is a strip of red cord piping to seal the gap between
the two panels, echoing the rather nice trim of the
 MG Montego. If I did
this exercise again, I would purchase a Montego and would probably use more of
the interior - maybe even the seats if doing a road car, as the modern seats are
exceptionally comfortable and much cheaper than aftermarket race seats.
The picture c
MG Montego. If I did
this exercise again, I would purchase a Montego and would probably use more of
the interior - maybe even the seats if doing a road car, as the modern seats are
exceptionally comfortable and much cheaper than aftermarket race seats.
The picture c learly shows the angles of arm rest and door pocket.
Cutting speaker holes was quite straightforward and I decided to attach the speakers through the ply panel rather than just to the door itself. This was mainly to ensure a neater finish to the vinyl and would assist in ensuring a rattle free door panel. I decided that the the rear doors would also benefit from small door pockets, more on the grounds of aesthetics than usefulness - especially as the right rear door would not be accessible by a passenger! The pocket part of it was a bit easier than the fronts as there was no need to incorporate a rear speaker.


Whilst the interiors were being done, the tin-worm was being attacked as they had really got into all the lower doors. As my welding equipment is gas only and my brazing and welding leaves a lot to be desired, only the worst rot was cut out and new metal let in, and the reinforced fibreglass paste was used judiciously in the areas just showing a bit of weakness - and to disguise the brazing...
Needless to say, the largest piece of metal I let into the outer skin of a door, resulted in a little bit of heat warp, but hopefully that will have been disguised. Slow and tedious work returning the doors to solid.
As an aside, I was thrilled to see the photographs of Andrew de Berne's car on the Magnette website, (V8 Magnette ) and couldn't help noticing that he has extensively drilled the doors for lightness. The Magnette front doors are very heavy, especially on the very front edge where it is double skinned and carries the heavy hinges, so lightening them does make sense, but I stuck to the originals on the grounds of strength and also time saving. A couple of extra kilos on a road car is not too dramatic.
As I had the car at home, work progress was slow to steady as this saved the bank balance from further damage and also gave me some time to think out a few areas. I wasn't looking forward to making the fibreglass bonnet and needed to establish a method of bonnet opening. I have never been a fan of large rear hinging bonnets with the radiator grille attached, as they make access to the main engine area somewhat restricted. I had already decided that the grille and front would be fixed and the bonnet would be a central spine with hinged and/or removable side panels. Creating this from scratch relied on the location of the radiator grille and some form of support and one of the jobs I had been dreading, so when Gary Matthews, a fibreglass specialist, offered to lend a hand, I gratefully accepted. Who wouldn't?
AUGUST 2007

However, before I could use Gary's expertise, it was critical that I at least mocked up what I wanted, so that when he had picked himself up off the floor laughing at my efforts, he would at least understand quite clearly what I was trying to achieve. The picture on the left shows a prototype support for the central spine of the bonnet and this curved bracket bolts between the radiator and the front shroud. The large clip on the top shows where the central spine would be attached, but this mock up uses hardboard. The intention was to get hold of Bruce, the metal magician, to form the central spine as this needed to be metal and the curvature was critical to maintain the original look as far as possible.
Whilst this was being mocked up, I decided to get the original radiator, rebuilt with a modern core. This decision was made after seeing Andrew de Berne's engine bay using the original Magnette radiator. To connect to the Rover V8, the outlets were too small, so part of the request to the radiator builder was to change the outlets to match the engine. Alan the rad builder suggested that he mocked up the top and bottom tanks, then we'd establish exactly where we wanted the outlets and he would also solder in a tapping for the electric fan sender. Unfortunately, due to illness, this was delayed by a week or two but it didn't really affect the overall progress.
 A thin fibreglass skin was taken off the left side of the original
bonnet
some time ago and although the quality was appalling (my fault!) as a thin
pliable skin,
it did form a lightweight base to play with, and this was built up later.
A line was
drawn
from the top of the chrome radiator shell grille towards the headlamp on the wing and this
established the position for the front panel. Once again, I used an older
thin skin of poor quality but it was fine as a base.
A thin fibreglass skin was taken off the left side of the original
bonnet
some time ago and although the quality was appalling (my fault!) as a thin
pliable skin,
it did form a lightweight base to play with, and this was built up later.
A line was
drawn
from the top of the chrome radiator shell grille towards the headlamp on the wing and this
established the position for the front panel. Once again, I used an older
thin skin of poor quality but it was fine as a base.
The two poor skins were
clamped to the original bonnet to establish the shape and a layer or two of
fibreglass mat laid over the top for strength - and then the hard work started, trying
to get a reasonable surface before Garry's arrival. A skim of filler and lots of elbow grease,
followed by more filler and more sanding - and that was before the edges of the
front had been formed to attach to the inner metal shroud and the radiator
grille! A short length of perforated galvanised m etal
corner strip normally used in dry wall or gib board was bent and tacked to the
front panel, and holes drilled to line up to the radiator shell to form an
edge, so that the grille can eventually be fixed in position. Picture on
the right shows the original (rough) panel with the metal edge. As a
test panel, it may not look too good but it was ideal for test purposes as
setting the grille is a critical part of the bodyshell as this area is generally
the focal point of the car, and it also had to be strong enough to cope with the
pressures of high speed and the inevitable battering by small stones.
etal
corner strip normally used in dry wall or gib board was bent and tacked to the
front panel, and holes drilled to line up to the radiator shell to form an
edge, so that the grille can eventually be fixed in position. Picture on
the right shows the original (rough) panel with the metal edge. As a
test panel, it may not look too good but it was ideal for test purposes as
setting the grille is a critical part of the bodyshell as this area is generally
the focal point of the car, and it also had to be strong enough to cope with the
pressures of high speed and the inevitable battering by small stones.
Whilst all of this was going on, I was constantly contemplating the under bonnet airflow, feeding cool air to the original SU carburettors, and also dissipating heat from the exhausts - particularly when the car is stationary, when the heat would build up under the bonnet. There is something very attractive and sporty about bonnet louvres, but would they extract enough heat? Or, would the proposed electric fan be sufficient to draw the heat out and away and through the transmission tunnel?
We nipped overseas for a short break, but a week's loss of progress at my rather limited hours wasn't going to make much difference. I did manage to fit a radio aerial to the front centre roof - a simple 1/2" hole was all that was required and the tail of the aerial fed down inside the left front A pillar. So much easier to do before any headlining was fitted - and that was going to be an interesting job, going around the roll cage...
SEPTEMBER and OCTOBER 2007
 The original very solid front bumper irons were attached as they do offer
some protection and will also act as towing eyes, (a racing requirement anyway)
and an old number plate was tacked between them. The thinking was to use a
new front (fibreglass) bumper to match the glass rear bumper, but split it,
Lotus Cortina style. Locating the numberplate is often a problem as many
cars were never designed to incorporate it, (E type Jaguar and my own Marcos
springs to mind) even though it is a mandatory requirement in just about all
countries. Stick on plates are often illegal, even though there are many
around, and nothing looks worse than a number-plate that is just tacked on as an
afterthought. Picture shows the lightweight skins before extra internal
strength was added.
The original very solid front bumper irons were attached as they do offer
some protection and will also act as towing eyes, (a racing requirement anyway)
and an old number plate was tacked between them. The thinking was to use a
new front (fibreglass) bumper to match the glass rear bumper, but split it,
Lotus Cortina style. Locating the numberplate is often a problem as many
cars were never designed to incorporate it, (E type Jaguar and my own Marcos
springs to mind) even though it is a mandatory requirement in just about all
countries. Stick on plates are often illegal, even though there are many
around, and nothing looks worse than a number-plate that is just tacked on as an
afterthought. Picture shows the lightweight skins before extra internal
strength was added.
Gary popped in with a simple skin off a front wing (fender), pleased that it
 was
possible to do it in one piece. He then took away the other wing and the
skin to build some strength into it and to build the attachment lip.
was
possible to do it in one piece. He then took away the other wing and the
skin to build some strength into it and to build the attachment lip.
This is one of those jobs that eventually sent me up a temporary blind alley as the time expended delayed the whole project considerably - probably due to the fact that my skill levels weren't up to the standard I required of the finished article...