
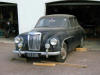

MG Magnette V8 - "MON ZA8"
Well, 2011 dawned with a distinct possibility that whilst the car may not be totally finished within a couple of months, there was an end in sight as the car was back from the painters and apart from the boot lid, bonnet and sill covers, assembly could be permanent as many items and sub assemblies not to mention wiring, could be attached for good.
The engine was running and a couple of (illegal) runs up the street whetted the appetite for a real drive. As usual, a couple of items had come to the surface that I wasn't too happy about. The first was the height and spacing of the foot pedals as they are not only very close, but the angles required by my feet and ankles was a bit uncomfortable. The handbrake lever was too far back and difficult to apply. The drivers door didn't seem to shut as close to the bodyshell as it should and there was no further adjustment available on the door catch.
JANUARY 2011
 Finally
securing wiring and finishing off soldering terminals and connectors was a slow
job and the bonnet fresh air vent needed sorting before the dashboard could be
finished. One of the critical tasks in any rebuild is looking a few steps
ahead and making sure that no back-tracking is required. The original air vent controls were dumped
as the revised dashboard made no facility for the control of the heating or
ventilation system. This was not an oversight! The air box jad been modified by
eliminating the hinged flap on the inside and replacing it with a fixed panel so
that it still fed the heater fan that only operates now as a demister.
An air tube (using old vacuum cleaner tubing of course!) feeds fresh air to the centre of the car, via old Mini eyeball vents
in the lower console.
Finally
securing wiring and finishing off soldering terminals and connectors was a slow
job and the bonnet fresh air vent needed sorting before the dashboard could be
finished. One of the critical tasks in any rebuild is looking a few steps
ahead and making sure that no back-tracking is required. The original air vent controls were dumped
as the revised dashboard made no facility for the control of the heating or
ventilation system. This was not an oversight! The air box jad been modified by
eliminating the hinged flap on the inside and replacing it with a fixed panel so
that it still fed the heater fan that only operates now as a demister.
An air tube (using old vacuum cleaner tubing of course!) feeds fresh air to the centre of the car, via old Mini eyeball vents
in the lower console.
The first pic shows the shortened operating rod and now uses a bent, threaded rod
that was part of an old dismantled mitre saw guide! This was secured with
a 5mm Nyloc nut at the vent end and the tail end carefully threaded through a 5mm hole drilled in the
 newly fixed cover plate
from the inside.
The operating rod attached to the flap was welded on (the original moved) but
the operating arm had to be shortened as
it wasn't allowing enough lift without hitting the front of the air box.
Because it had to be shortened, it meant that the original hole I had drilled
was in the wrong place! Easily fixed. On the inside of the car, a
knob was attached and just needed some form of simple slotted bracket to hold
the rod steady and the flap open, located inside the glove box. Maybe not
an ideal location, but it is merely one of those items that doesn't need
constant adjustment.
newly fixed cover plate
from the inside.
The operating rod attached to the flap was welded on (the original moved) but
the operating arm had to be shortened as
it wasn't allowing enough lift without hitting the front of the air box.
Because it had to be shortened, it meant that the original hole I had drilled
was in the wrong place! Easily fixed. On the inside of the car, a
knob was attached and just needed some form of simple slotted bracket to hold
the rod steady and the flap open, located inside the glove box. Maybe not
an ideal location, but it is merely one of those items that doesn't need
constant adjustment.
A short length of small channel rubber was affixed to the front of the aperture to eliminate rattles but from memory, the original had rubber around the flap that was badly perished. Fifty five year old rubber exposed to NZ's vicious UV sunlight is rarely in good condition!
WIRING
 Under bonnet, the right hand side wiring was the first to be tidied and
finished off. Although it would be nice to eliminate (untidy) wiring
altogether, I had considered running the wire under the wing/fender but as this
can attract a lot of road dirt, I left it on the inner wing. If I ever did
anything like this again, I would probably construct a conduit inside the wing
to hide the wiring but it was important to allow for easy dismantling should the
need arise. Although many take the Mickey out of Lucas electrics, what cannot be
denied is the simplicity of the Lucar, bullet connectors, as a simple rubber
grommet allowed several wires to be passed through a panel and the hole made
weather proof. The modern multi terminal plugs are a great system but they
need large holes and the rubber grommets need to be on the wiring from day one
and that is a bit more restrictive.
Under bonnet, the right hand side wiring was the first to be tidied and
finished off. Although it would be nice to eliminate (untidy) wiring
altogether, I had considered running the wire under the wing/fender but as this
can attract a lot of road dirt, I left it on the inner wing. If I ever did
anything like this again, I would probably construct a conduit inside the wing
to hide the wiring but it was important to allow for easy dismantling should the
need arise. Although many take the Mickey out of Lucas electrics, what cannot be
denied is the simplicity of the Lucar, bullet connectors, as a simple rubber
grommet allowed several wires to be passed through a panel and the hole made
weather proof. The modern multi terminal plugs are a great system but they
need large holes and the rubber grommets need to be on the wiring from day one
and that is a bit more restrictive.
Securing the wiring loom with cheap cable ties then wrapping the wiring in the modern plastic split conduit is much more practical than the old cotton wrapped looms that generally tended to absorb oil and dirt and never seemed to stay looking nice for very long.
The picture shows the location of the air horn compressor with a tube to the under wing for the air trumpets. On the first wiring test, the horn relay was clicking, but no power was getting to to the compressor, so another item to check. Horns and relays are not always wired the same way as other accessories.
As an aside, although I had wired up the electric fan (ex Toyota) with the thermostat built into the lower part of the rebuilt radiator, with a manual override switch on the dash, the fan had never kicked in, even when the temperature was up a wee bit. Whilst finalising the wiring, the multiple earth wires that terminate where the horn compressor is fixed I had one spare - or thought I had. What I had overlooked when planning the wiring was that the radiator, and therefore the fan, is mounted into a home built fibreglass support and not the original metal support. Easy to overlook, but this meant that there was no earth for the thermostat! The 'spare' earth wire was connected to the metal radiator shroud. Whether that solved the problem or not remained to be seen as there was insufficient fuel in the tank to run the car long enough to bring it up to temperature...
When I picked up the car from the painters, it was reluctant to start without a battery booster pack and even whilst at home, there appeared to be problems now and again even though the battery was fully charged. Purely by chance, I think I stumbled on the reason, though a burn to the back of a finger was the catalyst. Once again, it was reluctant to start and I caught my finger on the positive battery terminal - which was extremely hot. When I had a closer look, the main live cable terminal connection was not very good, so I removed the terminal clamp, sandblasted it, cleaned up the copper wires, heated them with a small butane blowlamp and with a squirt of flux, tried to add some solder - not very successfully. With new bolts in the clamp and generous coat of petroleum jelly, it fired up immediately...
Although many, many hours of work had gone into the lovely burr walnut dashboard, it was increasingly obvious that the durability of French polish was suspect as a finish, so although it looked fine initially, it started to craze on some panels when examined closely. Although it was rather early to talk about restoration, many lessons had been learned during the construction and replacing the dash later would be so much faster than the initial design and build, but I think that it would have to be finished with a durable two pack varnish.
 Rebuilding the doors was a job that needed doing in a strict sequence and the
front doors needed operative winding windows, but as the original window channel
had corroded, replacement was required. Initially, I had thought of making my
own front quarter-light rubbers and even bought a can of (expensive) 2 pack
rubber, but time was against me and I knew that if I did that, it would simply
delay the whole project - again. I decided to replace the opening
quarter-light with a fixed window and that meant a larger piece of glass or
acrylic. I opted for acrylic and this had to be completed before the main window
could be installed.
Rebuilding the doors was a job that needed doing in a strict sequence and the
front doors needed operative winding windows, but as the original window channel
had corroded, replacement was required. Initially, I had thought of making my
own front quarter-light rubbers and even bought a can of (expensive) 2 pack
rubber, but time was against me and I knew that if I did that, it would simply
delay the whole project - again. I decided to replace the opening
quarter-light with a fixed window and that meant a larger piece of glass or
acrylic. I opted for acrylic and this had to be completed before the main window
could be installed.
Fortunately, the local supplier was open early so managed to cut the windows and also a cover for the rear number-plate, within a day. The outer quarter-light frame had the lower rivets drilled out (see photograph) and using off the shelf rubber, I managed to get the plastic to fit quite well. Once again, the curve was a challenge so I had to cut some "V" slots in the rubber. Once installed, the next challenge was the window itself - something I was dreading.
Not so successful was
sourcing the window channel. A whole afternoon was lost hiking over
to the far side of town, only to find that the panel beating suppliers had
relocated to a property neat the airport...
 Pity their website designer
hadn't been told... When I got the channel home it was not going to fit as it
was too wide. Drat.
Pity their website designer
hadn't been told... When I got the channel home it was not going to fit as it
was too wide. Drat.
Assuming that the MGB would use the same size, I had couriered overnight two sets of MGB GT channel - but when I opened the box, they had sent door rubbers... So, a hike across to the far side of town again and this time I managed to get the soft flocked rubber channel which fitted OK, though the curve on the rear channel was a bit of a fiddle. The picture on the right shows from left to right - the original, the modern and the flexible flocked rubber.
The driver's door had been hung, but the passenger door was
still able to be worked on the bench. The weight of a bare door was bad enough.
With glass and window winder, it was definite two person job to rehang. I
wasn't sure how easy it was going to be to install the glass and the window
winding mechanism but once I had identified which holes the winder was supposed
to use, it wasn't really too bad. I should have fitted the bullet mirror
first... I fitted the mirror with just one bolt as
 I
know from past experience that until the seat is fixed in the correct position,
it is far too easy to get it wrong.
I
know from past experience that until the seat is fixed in the correct position,
it is far too easy to get it wrong.
The inner door had been extensively modified
to allow for a door pocket but the window stop is essential to prevent the
window falling out of the range of the winder. A piece of high density rubber
foam was glued between the window stop and the door to assist in eliminating
rattles and other pieces of what was carpet underlay, were glued on the door in
non-strategic places.
 The chrome strip was attached using the
plastic Christmas tree buttons with a
blob of silicone to assist in securing. Using the original metal clips was
deemed too expensive, sourcing was time consuming and metal rusts! The
original slots needed a light touch with a drill to open out a round hole.
The chrome strip was attached using the
plastic Christmas tree buttons with a
blob of silicone to assist in securing. Using the original metal clips was
deemed too expensive, sourcing was time consuming and metal rusts! The
original slots needed a light touch with a drill to open out a round hole.
Whilst waiting for the arrival of the plastic quarter-light windows and trims, I moved to the fibreglass boot/trunk lid. I had taken a simple skin off the original some time ago and had already decided that I wasn't using the heavy original hinges and opted for a lift off panel. This does have some disadvantages such as putting the panel down somewhere safe when accessing the boot, but the ease of removal for access is also of benefit. If I was an engineer, I would probably have developed a lightweight pin hinge with an easy option to slide off the panel.
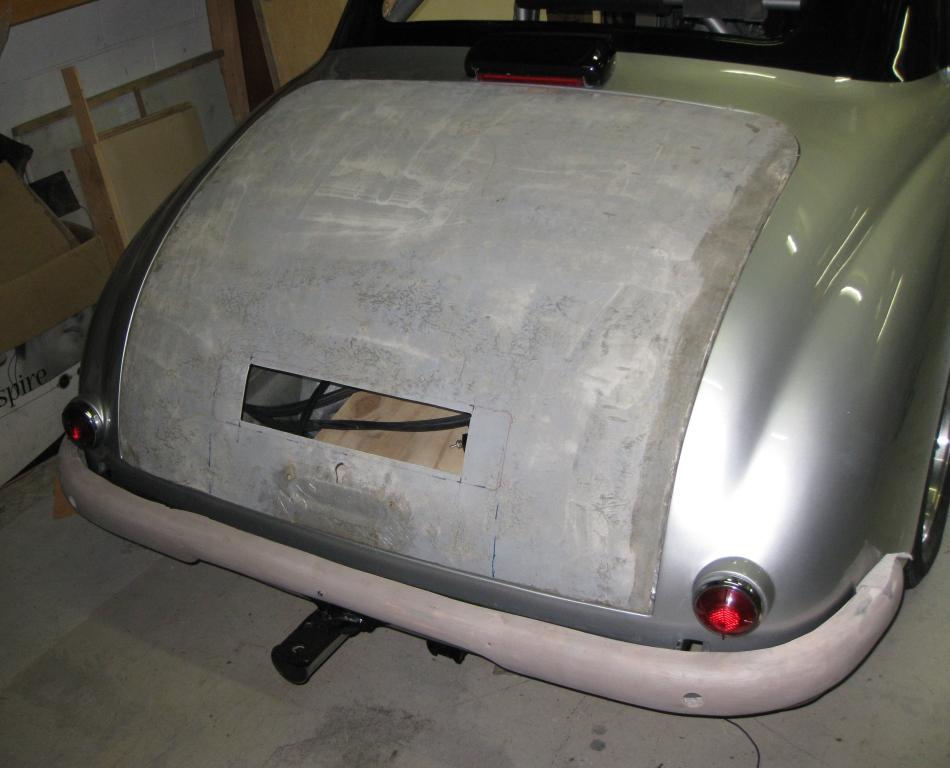 The
original rear number plate light and fancy chrome cover were in a terrible state
so it was pointless using them so they were put to one side. The number plate
mounting position is a matter of aesthetics as if it is set too low, I think it
makes the rear of the car as though it has a big bum! I opted to lift it
from the base and mount the number plate inside a cavity that could be protected
by perspex. The awkward part is fitting number plate illumination lights with a
removable panel...
The
original rear number plate light and fancy chrome cover were in a terrible state
so it was pointless using them so they were put to one side. The number plate
mounting position is a matter of aesthetics as if it is set too low, I think it
makes the rear of the car as though it has a big bum! I opted to lift it
from the base and mount the number plate inside a cavity that could be protected
by perspex. The awkward part is fitting number plate illumination lights with a
removable panel...
Seen in the pic is the rough rear bumper but with the 40mm holes for the park distance sensors and the tow bar.
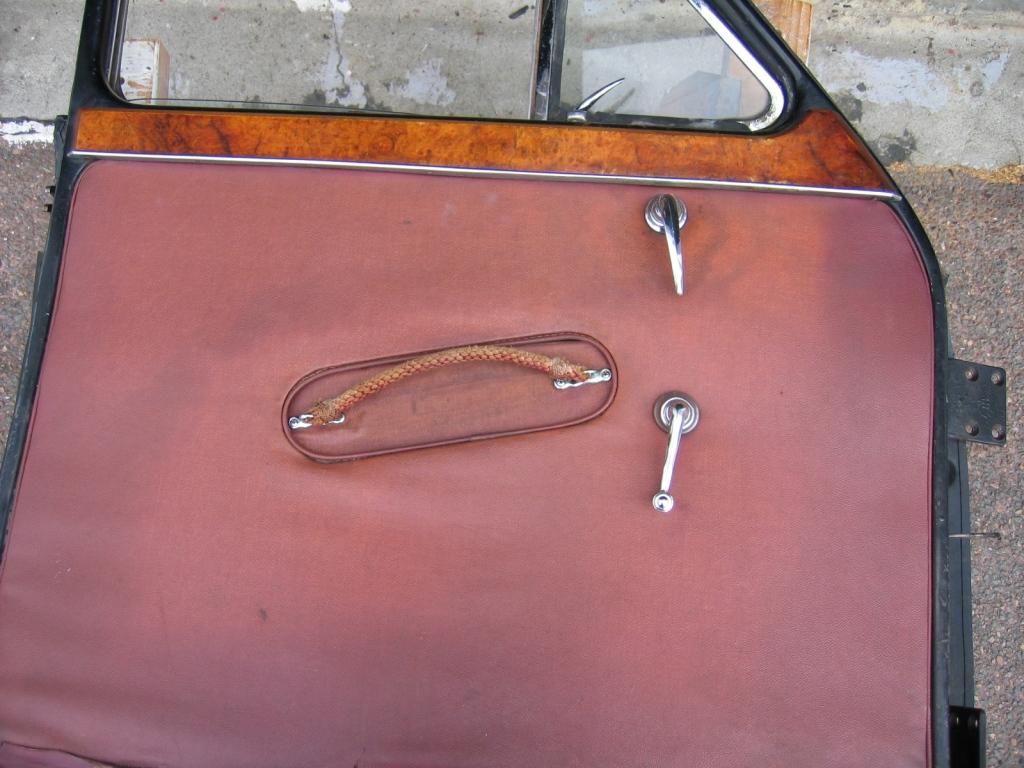
The speaker and front door panels were attached but it seems that the small pins that secure the window winders and door handles had gone walk about and the new replacements were a tad too long and needed grinding down, so the final pictures showing the before and after are not 100% final as the spring loaded cone is missing from the door handle. Just below the door check strap is a piece of rigid rubber tube with a collar on the end that I think came from an old foot pump! I drilled matching holes in the door and the A pillar and threaded the tube through from inside the door then threaded the speaker wire through it. The bodyshell had a larger hole and a piece of slightly larger diameter plastic tube was affixed so that the door tube ran through it when the door closed - without kinking.
The two pics below show the before and after, but just before the zinc plated machine screws in the black vinyl were replaced with black Allen headed screws (all I could get in black...


The picture obviously shows the location without the front wing as this has to be fitted before the washer and closer panel. The small tube that is shown going the through the handle to the left is a screen condensation drain and was looped around the bottle, through a "P" clip attached to the lower front edge of the cavity, acting as an extra locating point. The original wing closer panel had badly rusted so a fibreglass one was made up and a plywood slot attached for the bottle neck. Simple, cheap and effective for a screen wash system that is now totally hidden and OK as long as the air locks aren't an issue. Maybe siting the screen pump lower to give a bit of an syphon effect would be a better solution - but this project always was going to cover the blind alleys...
With the front wing fitted, the shape of door and wing didn't seem to match too well...
The sidelight was wired up as an indicator light and the headlamp unit (ex Mini) with a side/parking light incorporated, fouled the headlamp bowl mounting, so a slot had to be cut and a portion of metal folded over. The side light tested OK along with the indicator light and the hazard flashers. At this point, the headlamp/dip light had no fuses in, so wasn't tested, but there was no reason why it shouldn't work, so my attention moved on quickly to fitting the plastic/glass and making the panels for the left rear door. Quite why these ply panels hadn't been cut out earlier I don't really know, but as my methodology is often to develop one then move on, no real surprise.
All four doors were attached and the interior panels added as they were completed and the left front wing had a coat of bitumen paint on the interior before checking the headlamp and indicator fittings and the wiring.
Observant readers will have remembered the heater matrix was located inside the rear cavity of the front wing, but this meant access to attach the wing was a little tricky. The wing also needed a little bit of trimming as the bodyshell repairs were a slightly different profile.
Next job was to finish off a few loose ends on the new wiring circuit for the trafficators. As this extra switch wasn't in the original plan, I opted to add a small panel, suitably veneered, under the right side of the dash. What I did find as I wired up the car, was that the choice of wiring plugs/sockets was an important decision. Part way through, I changed from round pins to the more traditional spade terminals on a couple of joints, as the round terminals appeared to suit the lighter gauge wire, but didn't suit the older heavier gauge wire that I had used.
Even though I had spent many, many hours on the woodwork, the decision to use French Polish I fear will have proved to have been a mistake. I have already decided that once the whole project has been completed, that I will redo the dashboard. It may well look the same, but the two pack lacquer is so much more durable. French polish seemed to be giving me a few problems with premature aging!
FEBRUARY/MARCH/APRIL 2011
Having taken a short break to celebrate a big birthday, a three month overseas break to celebrate the coming of age was looming fast and a busy time organising a race meeting, so the chances of the car being on the road before the NZ winter set in were reduced considerably - again. Time and tide waits for no man...