
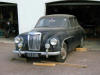

MG Magnette V8
Another year! So 2013 dawned brightly in terms of weather, but trying to hide the front cage by putting in a false ceiling (see part 24), meant a lot of awkward lying and twisting and at some stage (January 9th to be precise...) I put my neck/back out, just as I was finishing it.
Almost overnight, I was in such extreme pain I couldn't even get out of bed until the 5th attempt! More to the point, I also lost most of the use of my left hand, particularly the fingers and with it, most of the strength too. A nerve was pinched or trapped, call it what you will. However, initially I didn't know that and thought a trip to the Chiropractor for a manipulation would be fine. Wrong again. To cut a long, painful, boring story short, after a surgeon's visit and MRI scan, it is another collapsed vertebra and a painful trapped nerve requiring (another) spinal fusion...
But work, although limited had to carry on, regardless of how slowly.
 |
 |
 |
 |
 |
 |

The repeater is an off the shelf LED item from the local electronics store and fits nicely in the original hole for the trafficator mount - which had been butchered anyway when belts had been originally fitted. |
SUNDRY PROGRESS
Backtracking a wee bit, to work in progress just before Christmas and over the new year. I attached Paul's cantilever hinge arrangement so that the boot lid clears the fuel filler/hi-stop brake light bubble.
As yet unpainted but nicely engineered and whereas the original Magnette hinge arrangement weighed a ton, the new system is very light-weight, as it only has to support a fibreglass panel.
The two hinge mechanisms were mounted in basically the same position as the originals. When doing projects like this, it is all too easy to overlook something simple - as I found out when the boot lid fouled the bubble(!), so the location of the hinges followed the original, as the left hinge had to clear the spare wheel. This meant that the right side hinge (shown) is fairly close to the outside of the car, but the left hinge is more central. Remember here that the wheels and tyres now fitted are wider than the original, so the spare wheel well had been widened, but the new hinge clears it - just..
The lid of the built in tool box when opened, just fits between the hinges - but I think that was just good luck!
Eventually, lightweight gas struts will be fitted to hold the lid open, but meanwhile, the other tasks were of far more importance.
The rather fraught roof lining is shown as 3 component pieces, with the lower part of the shown panels to the front of the car. Made out of lightweight covered plywood, attached to a lightweight timber slat at the sides and the rear, (visible in the pic) this would have provided a covering to effectively hide the front cage, and prevent a head striking the metal cage. Well that was the theory anyway...
I already knew that the roll cage wasn't identical both sides, so the lining wasn't that easy, needing a packer on one side.
There is no point in addressing the finer details of the fixing as it had to be removed anyway...
The screen pillar ("A" post) bar was covered with (glued) black vinyl and the door rubber was attached.
Rather than buying the real Magnette item, this was an off the shelf profile from the local Plastic Box/Para Rubber store, which does the job. Not as attractive as the genuine item maybe but even this stock stuff in rubber is far from cheap and it seems to be OK.
INTERIOR
A problem that surfaced last July (2012) just as the car was being trailered to the certifier, was a leaking master cylinder. Farnie had used a standard two pot silver paint for the interior and the brake fluid acted as a very efficient paint stripper...
Paul had sorted out the master cylinder but scraping off the bubbled paint was one of those jobs that I could have done without. It begged the question though, what if good carpets and felt underlay had already been fitted?
After the bubbling paint had been removed from the floor, it was washed with clean water, then painted with POR15, which is probably impervious to brake fluid anyway. The vertical surface was to be be scraped and repainted later.
As the intention is to add a certain amount of sound deadening felt, would it be sensible to assume that in the future, a fluid leak would need to be diverted so as to preserve the carpet?
It always amazes me that no matter how careful you are with a build, unless you are a concours nut, it never seems to stay looking good for very long, either through a hiccup like this, an oil leak or whatever! What was a decent coat of paint has effectively been wrecked, but limited to the driver's side interior.
Maybe a couple of of drain holes "just in case" wouldn't be a bad idea...
The cables to the left of the picture are at the base, the speedo cable (was still to be checked to see if it was in fact working, as the instrument wasn't reading) and the main cable from the kill switch to the starter. The main cable has since been moved up and clipped to the tunnel and bottom left, a fire extinguisher has been bolted to the floor, in front of the driver's seat. Only when all was OK, could the issue of carpet and sound deadening really be addressed.
ENGINE
Under the bonnet, Paul had also fitted a breather to the rear of the right side rocker cover and this is fed into a catch tank, along with the existing breather from the left cover, mounted on the left inner wing/fender.
The heater air hose, is visible here, through the bulkhead and then heading into that boxed in cavity containing the heater matrix.
The original Rover breather on the right rocker cover is a large cumbersome affair, so that was capped temporarily, until a plug for the rocker cover could be sourced and fitted. Paul believes it may be 1"BSP thread, but it is easy enough to remove and take down to a supplier.
REPEATER LIGHT
A photograph that was missed out earlier was of the side repeater for the new hazard flashers/indicators as opposed to the old semaphore arm trafficators that are refitted, but on a different circuit - more for novelty value than anything else. Modern motorists never look for trafficators so this is a safety issue too. This was easy enough to install and is something that may modernise the car but but did mean that the seat belt mount for the shoulder strap wouldn't be able to be used, so this would have to be attached to the roll-over bar.
RE EXAMINATION AND RED TAPE
The certifier's re-inspection of the suspension was carried out and he was happy, but I'm getting a bit ahead of myself, so back to the red tape, which rather dominated my time from January onwards. Being physically incapacitated from early January merely shifted the focus on to emails, internet message boards and telephone conversations as this saga took another turn or two. Check back to part 24 to refresh your memory as to the Roll cage.
January 2013 MSNZ LOG BOOKS/CAGES/ LVVTA/CERTIFICATION/COMPLIANCE and other red tape...
Although several people had been involved in the whole process up to this stage (four different workshops), this was the procedure that I was working to, to get the car on the road.
- Apply for a Motorsport NZ logbook
- Get the cage homologated by MSNZ
- Apply for an Authority Card (from MSNZ) - that allows the use of full harness seat belts on the road
- Get the car certified
- Take the car for compliancing
- Get a Warrant of Fitness (MoT in the UK)
- Pay for the road registration
However, somehow throughout the 8 year project period, until Scottie informed me, I was totally unaware of the LVVTA paperwork requirements. The certifier had informed me back in July 2012 that working drawings of the modified front suspension would need to be submitted, and I assumed that this would be done at the time of the final inspection. I was aware that those drawings might meet a challenge from the committee, but then the project ground to a halt...
What the procedure should be (and I hope that this assists any other NZ project car builder) is this:
- Print out the LVVTA paperwork (this can be done before you even begin)
- Consult the "Hobby Car Manual" as this is their "bible".
- Discuss the proposals with a certifier, but make sure the above are referenced
- Lodge the LVVTA paperwork and await the response to your design plans
- Modify your designs/drawings as requested and then proceed
- Resubmit until such times as you get approval (and consult with the certifier)
Only then does the original sequence apply!
- Apply for a Motorsport NZ logbook
- Get the cage homologated by MSNZ
- Apply for an Authority Card (from MSNZ) - that allows the use of full harness seat belts on the road
- Get the car certified
- Take the car for compliancing
- Get a Warrant of Fitness (MoT in the UK)
- Pay for the road registration
Needless to say, this extra but crucial stage but done after the car was almost ready to roll, caused its own set of headaches. The roof lining was in, using a caravan grade surface ply and I was happy enough that from outside or from the front (through the windshield) the front cage was virtually invisible.
Having decided that there was now no need for an homologated cage, I applied for a MSNZ logbook, which arrived a few days later.
- Apply for a Motorsport NZ logbook √
Before going any further, I now had to backtrack on the system and submit the LVVTA paperwork, but the sensible thing was to get the certifier around to check that all the work required had been completed to his satisfaction.
The requested front suspension and steering modifications were all passed off as OK. The certifier then queried the status of the boxed in roll cage as he wasn't 100% sure what the requirements were, given that he knew that MSNZ wouldn't accept it. His initial stance was sympathetic, but needed to seek authority or clearance from above to pass it as OK.
For once, we had a positive response and after some discussion with LVVTA, they believed that in a 60 year old car, that extra roll over protection might well be a good thing and therefore I didn't need to cut it out after all. The bad news was that I had to remove the lining that had caused my incapacitation!
My mood lifted considerably, and even though it was a struggle, I quickly removed the lining and stored it in the garage. Checking with the certifier confirmed that I'd need to add roll bar padding above the doors - no problem.
The next stage was to apply for an authority card as NZ doesn't allow full harness belts in a road car (not sure why) but the application form has to be signed off by a licenced scrutineer. Fortunately, the certifier is also a licenced scrutineer.
Then it got all silly again...
I got an email from the certifier saying that MSNZ were considering asking for the return of the logbook, as they thought the front cage had been removed! But, as the seat belts would be attached to the harness bar (the lateral bar at neck height) and the roll protection cage wasn't homologated, then the belts could not be attached to the bar and used on the road, so no authority card could be issued...
Bear in mind that no homologation is required for a hoop and back stays anyway, this merely compounded the problem with the change in material from 38mm to 44mm.
The certifier suggested that although car is old enough to escape compulsory seat belts, he wouldn't be happy with no belts at all, and suggested the fitment of normal lap and diagonal belts. As I am totally in favour of using seat belts, regardless of the age of the car, I had no problem with this, other than the shoulder attachment may need to be to the hoop, rather than the B pillar - even though the car as acquired did have lap and diagonal belts.
FEBRUARY 2013
The LVVTA paperwork (20 pages or so) had to be accompanied by working drawings of the front suspension. With just one working hand, not to mention zero experience of technical drawing, this was beyond me, so I had no choice other than getting back to Paul. Paul did what he could on the overall stuff and I struggled with a drawing of the top suspension and I then posted everything to LVVTA in plenty of time for them to be circulated to their committee for assessment.
As soon as they had been received, I had a call to say that they needed better drawings. All I could do was pass that on to Paul and ask that he talk directly to LVVTA - which he did.
We sent off the updated drawings in time for their March 5th, monthly meeting.
MARCH 2013
The drawings were rejected, with a few queries...
The sad part about the system is that any professional workshop can modify a car in NZ as can any amateur. When I queried that Paul's work, knowledge and workmanship were top notch and that the others involved were suitably experienced, so why are we having these problems, the answer given was quite simple. LVVTA work from what they call their "Hobby Car Manual". The HCM is their bible, their reference and therefore what they are bound by. All modifications have to adhere to their book of words.
An amateur, commencing a design of their own special or their own car from scratch, would in all probability, buy the manual and that would be their reference throughout. They would also hopefully submit their paperwork along with the $95 fee and before they had gone too far, would have had advice from the LAC committee. The end result would probably mean that the final certification was fairly straightforward.
The LVVTA as a team of experts, carries out this rather onerous task in lieu of a government department who would probably quite happily ban all modifications altogether! It comprises members of the Hot Rod community, who are well versed in modifying cars well away from standard, or building cars from scratch.
However, the majority of race car workshops and general workshops undertaking modification work, appear to be totally unaware of the existence of the manual. That certainly applied to all those who were involved in working on this particular build. When workshops specialise in track or circuit cars, the hobby manual obviously doesn't apply. It is only when these certifiable modifications are carried out on an existing road car, or a car intended for the road, that these regulations kick in.
Sadly, for me, many thousands of dollars have effectively been wasted, by entrusting work to reputable workshops or engineers, who were blissfully unaware of the current regulations or even the existence of this "Hobby Car Manual".
As I hadn't had anything other than the email regarding the rejections/queries, I rang LVVTA to see if the paperwork was to be returned. It wasn't! I half expected a homework style of returned work with a red pencil circling the errors...
APRIL 2013
Paul came down early April and the certifier was also on hand to go through any outstanding issues with him, which was important, given my technical ignorance. The consensus was that it was only now the drawings that needed updating and hopefully, they will be re-presented in time for the May meeting. The certifier measured the steering column angles to confirm that it met the collapsibility requirements and confirmed that the suspension arm construction methods and the ball joints were OK.
So even assuming that is successful, we still have the final certification inspection and the rest of the procedure to follow before the car can legally get put on the road. With the 9 year anniversary fast approaching, that would be nice.
Then we are overseas from mid July until mid October...
To say that I am somewhat de-motivated at the moment would sum things up pretty well. With a totally useless left hand that can't even grip a nut or bolt, progress overall is minimal.
Progress! Now in this Thursday April 11th... Woohoo!
A bit of very slow progress has been made though.
MINIMAL PROGRESS
One of the advantages of fitting the Montego column switch gear was that it came with delay wipe (which now works well), hazard flasher switch (which also works well), and washer switch. You may remember that at the rear of the left front wing/fender, the cavity was used to mount he ex-Mini heater radiator and this forms the basis of the demister.
In my quest for a fairly minimalist engine bay, I opted to mount the screen washer bottle in the right side cavity. Using a 2 plastic litre milk bottle and mounting the screen wash motor was fairly straightforward, but I soon realised that the water would drain back through the pump into the bottle. Sorting through my pile of ex Mini bits, I managed to find a valve that prevented this and inserted this above the pump. Success! With new wiper blades fitted and the motor correctly set to park on the correct side of the screen, that is one task I was glad to complete .
Minimal progress on the fibre-glassing was as much to do with trying to get a good fit as anything else. The MG grille has been angled back very slightly. (Probably a mistake... Not enough to be noticeable) and this affected the fit of the side opening bonnet panels. The panels were initially taken as skins off the original bonnet, but the complex curves mean that even minor changes to the grille location, impacted severely on the panel fit. A fair bit of cutting and shutting of the fibreglass eventually had the right side sitting fairly well, then work moved to the side panel.
Part of this work also involved directing airflow from the side of the radiator opening towards the carburettors. Quite why I keep making extra work for myself I am not too sure...